Mobile Apps with Phonegap and Yeoman
Link to github repository
I’ve been building mobile-first web applications for some time now, and I want to describe my development process from start to finish (including deploying to the web, to iOS, and to Android devices). To start, I develop using a macbook pro, sublime text 2, and terminal. I would suggested either installing these, or similar tools you are familiar with.
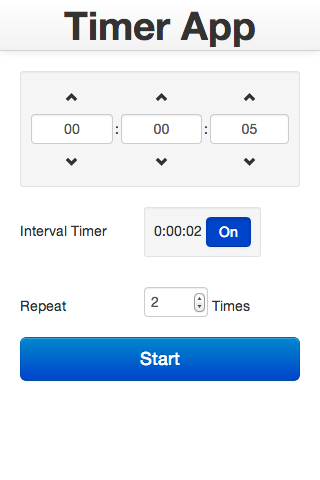
I will be building a timer app - starting with a blank application, to web application, to mobile applications. My framework for this demonstration will be using angularjs, but simply replace these packages and angular references with what you want to use.


Setup
Install these tools:
- Node.js and npm node -v 0.10.*
- Yeoman yo -v 1.0.*
- Phonegap/cordova cordova version 3.1.*
- Xcode or Android SDK + Emulator (depending on what you want)
consider installing both yeoman and phonegap packages globally
npm install -g yo
npm install -g cordova
Next lets create our application structure using the following ‘cordova’ command. I’ll call my app ‘timer’. Make sure you are using node version 0.10
nvm use 0.10
cordova create timer com.lpprojects.timerapp "TimerApp" /** the com.company.appname is like a backwards web domain naming convention for mobile apps **/
cd timer
cordova platform add ios /**add platforms you want to support here**/
Now it’s time to use Yeoman to scaffold a basic angular application.
Please Note: yeoman allows you to scaffold apps using many frameworks
Run the following (replace angular with your framework of choice):
yo angular
Yeoman will ask you a series of questions related to the package you requested(see below). I will not be using these options.
Would you like to include Twitter Bootstrap? (Y/n) n
If so, would you like to use Twitter Bootstrap for Compass (as opposed to vanilla CSS)? (Y/n) n
Would you like to include angular-resource.js? (Y/n) n
Would you like to include angular-cookies.js? (Y/n) n
Would you like to include angular-sanitize.js? (Y/n) n
Now that your scaffolded app is complete, lets take a look at what it generated:
- app ~ this is where your development code will live
- node_modules ~ all grunt modules are installed here
- test ~ if (hopefully when) you write tests, they will go here
- component.json ~ think of this as your front-end package information
- gruntfile.js ~ the file containing all the tools to develop, test and deploy code (Why not take a look inside)
- package.json ~ this of this as your back-end package info (since this is a single page app, it just contains grunt related info)
Refer to https://Yeoman.io for any additional Yeoman questions I don’t cover in this post.
Configuring
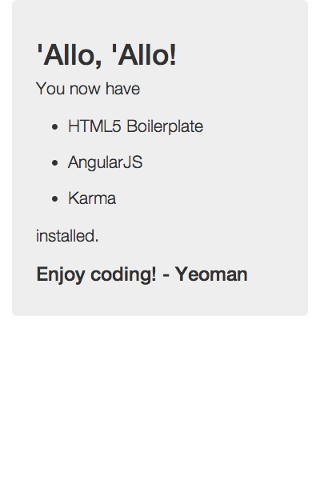
Now we can view the default application by running:
grunt server
This will launch a live-reload web server
Next I want to use some additional javascript libraries not included in the scaffold. To add these, open the component.json file, and modify the file to your liking.
Yeoman scaffolding uses an older versions of angular, so I will upgrade that first. This process is important for understanding how to manage all your development packages from one place.
component.json
Before
{
  "name": "timerApp",
  "version": "0.0.0",
  "dependencies": {
    "angular": "~1.0.5",
    "json3": "~3.2.4",
    "es5-shim": "~2.0.8"
  },
  "devDependencies": {
    "angular-mocks": "~1.0.5",
    "angular-scenario": "~1.0.5"
  }
}
After
{
  "name": "timerApp",
  "version": "0.0.0",
  "dependencies": {
    "angular": "~1.2.0",
    "json3": "~3.2.4",
    "es5-shim": "~2.0.8"
  },
  "devDependencies": {
    "angular-mocks": "~1.2.0",
    "angular-scenario": "~1.2.0"
  }
}
Run the following command to install these packages:
bower install
The new version of angular broke the generated code, time to fix this.
Adding dependencies
In the new angular version, The ngRoute module was removed from the core project (angular.js) and I now need to include that as a seperate dependency. I will add the file to my component.json and install it.
- angular-route : ngRoute module used for routing the browsers url to different parts of our application
The other three dependencies will be used to enhance the mobile development.
- angular-localstorage : allows us to store user specific info locally on the device and in the browser
- angular-bootstrap : make use of the bootstrap for angular (specifically the js part)
- sass-bootstrap : make use of the sass version of bootstrap (scss / css)
Add to “dependencies” in component.json
"angular-route": "~1.2.0",
"angular-localstorage": "latest",
"angular-bootstrap": "latest",
"sass-bootstrap": "~2.3"
Run in terminal
bower install
next I need to include the file on the page so in index.html I add it under the angular.js reference:
index.html
<script src="components/angular-route/angular-route.js"></script>
<script src="components/angular-localstorage/localStorageModule.js"></script>
<script src="components/angular-bootstrap/ui-bootstrap-tpls.js"></script>
app.js
finally add the dependencies into my angular application in app.js. see the [‘ngRoute’] is the loaded dependency
angular.module('timerApp', ['ngRoute', 'ui.bootstrap', 'LocalStorageModule'])
NOTE: adding Angular dependencies is a useful process to remember if using angularjs as your framework.
Developing
Now that I have setup my project, I’m going to start building my app.
Programming
Since I don’t want to focus on the actual writing of code, please take a look at my github repository for the timerApp code.
Build/Compile
First we need to add a node module called ‘grunt-shell’ so that we can integrate the cordova build task into our grunt build task. Open package.json and add the following line to the devDependencies
"grunt-shell": "latest"
Then run ‘npm install’ to install the package.
Next lets modify the gruntfile.js to support phonegap Add the Phonegap config property
var yeomanConfig = {
  app: 'app',
  dist: 'dist',
  phonegap: 'www'
};
Now we need to add the configuration for the phonegap build task
shell: {
  phonegapBuild: {
    command: 'cordova build'
  }
}
By default phonegap expects your application to live in www folder, so we will use that. Next we will modify the clean task to account for the new phonegap directory
clean: {
  dist: {
    files: [{
      dot: true,
      src: [
        '.tmp',
        '<%= yeoman.dist %>/*',
        '!<%= yeoman.dist %>/.git*'
      ]
    }]
  },
  phonegap: ['<%= yeoman.phonegap %>/*', '!<%= yeoman.phonegap %>/config.xml', '!<%= yeoman.phonegap %>/res'],
  server: '.tmp'
}
When we clean the build, it will delete everything but the phonegap config.xml, and the res directory with icons and splash screen images. Next lets modify the copy task, adding the phonegap sub task.
copy: {
  dist: {
    files: [{
      expand: true,
      dot: true,
      cwd: '<%= yeoman.app %>',
      dest: '<%= yeoman.dist %>',
      src: [
        '*.{ico,txt}',
        '.htaccess',
        'data/*.json',
        '*.html',
        'views/*.html',
        'components/**/*',
        'images/{,*/}*.{gif,webp}',
        'styles/fonts/*'
      ]
    }]
  },
  phonegap: {
    expand: true,
    cwd: '<%= yeoman.dist %>',
    dest: '<%= yeoman.phonegap %>',
    src: '**'
  }
}
Now, the build task will need to make use of the changes above. I prefer to make use of the target paramater when running ‘grunt build:target’.
grunt.registerTask('build', 'build task', function(target) {
  target = target || 'dev';
  if (target === 'phonegap') {
    grunt.task.run([
      'clean:phonegap',
      'clean:dist',
      'jshint',
      'test',
      'coffee',
      'compass:dist',
      'imagemin',
      'cssmin',
      'htmlmin',
      'copy',
      'cdnify',
      'ngmin',
      'uglify',
      'rev',
      'copy:phonegap',
      'shell:phonegapBuild'
    ]);
  } else {
    grunt.task.run([
      'clean:dist',
      'jshint',
      'test',
      'coffee',
      'compass:dist',
      'useminPrepare',
      'imagemin',
      'cssmin',
      'htmlmin',
      'concat',
      'copy',
      'cdnify',
      'ngmin',
      'uglify',
      'rev',
      'usemin'
    ]);
  }
});
Please note for the else condition, I moved the ‘concat’ task before ‘imagemin’ because it causes css compile issues otherwise. For the phonegap build, I don’t want to minify the scripts for debugging purposes.
you will notice, when we pass ‘phonegap’ as the target, it simply cleans the phonegap directory, builds the app, and copies the re-build code to the phonegap directory. The last command build the actual ios application.
To build the web app, simply run
grunt build
And to build the phonegap app run
grunt build:phonegap
Debugging
For the web
grunt server
with your favorite browser (mine is chrome)
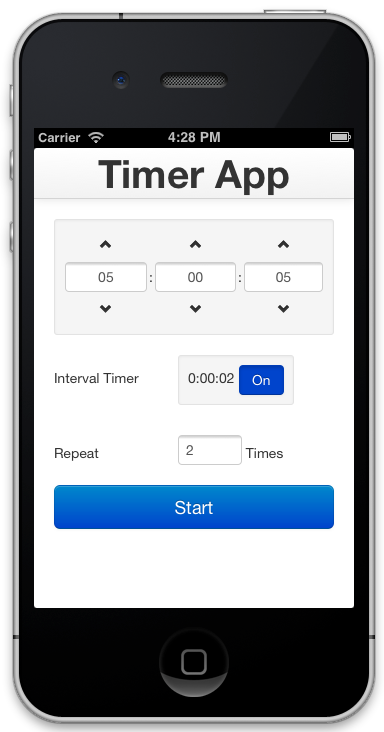
For ios once the phonegap application is build you can run using:
cordova emulate ios
or by opening the xcode project file - appName/platforms/ios/appName.xcodeproj (instructions)
once the simulator is up and running, open up Safari and go to Develop -> iPhone Simulator -> index.html
Use the device
Now for the most useful and important part of using phonegap - use the device features Here is the phonegap list of features. In timer app, I will be making use of the vibration features.
When the mobile app is built, a cordova.js file is injected into the root directory. For simplicity, we will just include the reference in our index.html file. This will need to go within the head section of the index.html file.
<script src="cordova.js"></script>
Next lets fire the correct events in our app when we want. The vibration api can show us what we need to include.
navigator.notification.vibrate(2500);
In main.js I refer to this call. Now for some device specific features, they are only useable on an actual device (vibrate, beep), but other features like contacts, alert and so on is still useable just with the simulator.
Conclusion
Thats all you need to start developing phonegap mobile apps. Just remember, the libraries and tools I use will surely be upgraded as time goes on, keep that in mind when following my instructions. If you have any questions, confusions or suggestions please feel free to leave a message below. Happy mobile app development!